Monitoring Solution using a TimeSeries Database exporting Infra Metrics (Part 3)

What is InfluxDB?
InfluxDB is an open-source schema-less Time-series database that specializes in the storage of time-series data for operations monitoring, application metrics, IoT sensors, and real-time analytics.
InfluxQL is an SQL-like query language for interacting with data in InfluxDB. It is a push-based database which means it can’t collect your data and you need to push to it.
Telegraf : It is a plugin-driven server agent for collecting and sending metrics and events from databases, systems, and IoT sensors.
Its purpose is to collect data from the given data sources and push it to InfluxDB. It has a lot of plugins which helps in collecting data from multiple sources and write to multiple targets.
InfluxDB2 Installation
Manual Download (Ubuntu): (Method 1)
Step 1: Prerequisites
a) You should have a running Ubuntu 20.04 LTS Server.
b) You should have sudo or root access to run privileged commands.
c) You should have apt or apt-get utility available in your System.
Step 2: Add GPG Key
1.wget -qO- https://repos.influxdata.com/influxdb.key | gpg — dearmor | sudo tee /etc/apt/trusted.gpg.d/influxdb.gpg > /dev/null
Step 3: Setup Repo
1.export DISTRIB_ID=$(lsb_release -si); export DISTRIB_CODENAME=$(lsb_release -sc)
2.echo “deb [signed-by=/etc/apt/trusted.gpg.d/influxdb.gpg] https://repos.influxdata.com/${DISTRIB_ID,,} ${DISTRIB_CODENAME} stable” | sudo tee /etc/apt/sources.list.d/influxdb.list > /dev/null
Step 4: Update Your Server
sudo apt-get update
Step 5: Install InfluxDB2
sudo apt-get install influxdb2
Step 6: Verify Installation
dpkg -L influxdb2
Step 7: Check InfluxDB Version
influx version
Step 8: Start InfluxDB Service
sudo systemctl start influxdb
sudo systemctl status influxdb
Docker Compose (Method 2):


Fluent-bit is pushing the system metrics data to Apache Kafka topic “monitor-topic” and Telgraf is fetching the data from Apache Kafka and pushing to InfluxDB bucket “monitordb”
DOCKER_INFLUXDB_INIT_USERNAME: Sets the username for InfluxDB
DOCKER_INFLUXDB_INIT_PASSWORD: Sets the password for InfluxDB
DOCKER_INFLUXDB_INIT_ORG: Sets the organization name
DOCKER_INFLUXDB_INIT_BUCKET: Bucket name where you want to push your data in Influxdb
DOCKER_INFLUXDB_INIT_ADMIN_TOKEN: It helps to push data to InfluxDB.
In the volumes section of Telegraf, we are replacing our updated Telegraf config file with the default one.
Telegraf Configuration File

In the OUTPUT section Data is send to the InfluxDB2 URL and it is writing the data into the given organization and bucket with the admin token which are all provided by the environment variables.
In the INPUT section, we are giving Kafka’s URL, Kafka topic to listen to, and a consumer group name and data format field which means Telegraf will expect data in JSON format from Apache Kafka .
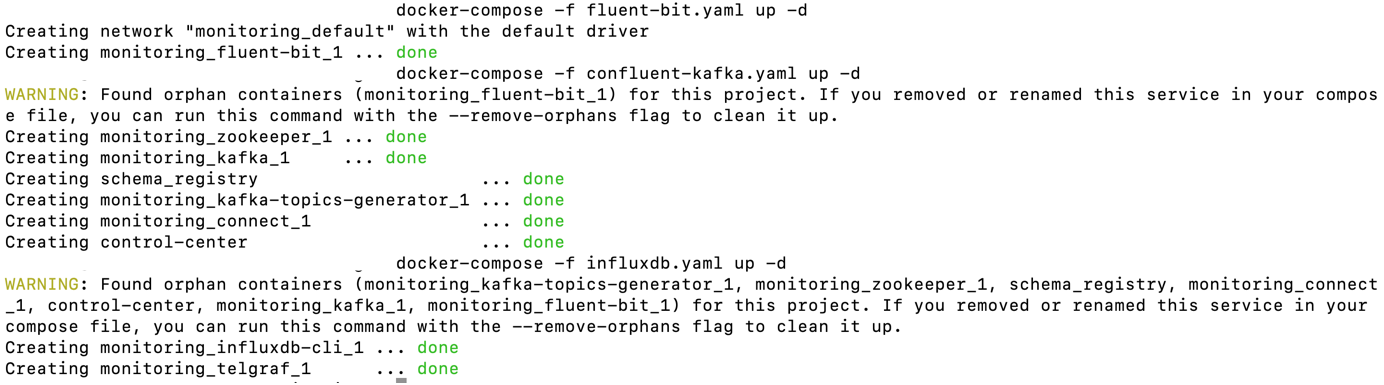
$ docker-compose -f influxdb.yaml up -d
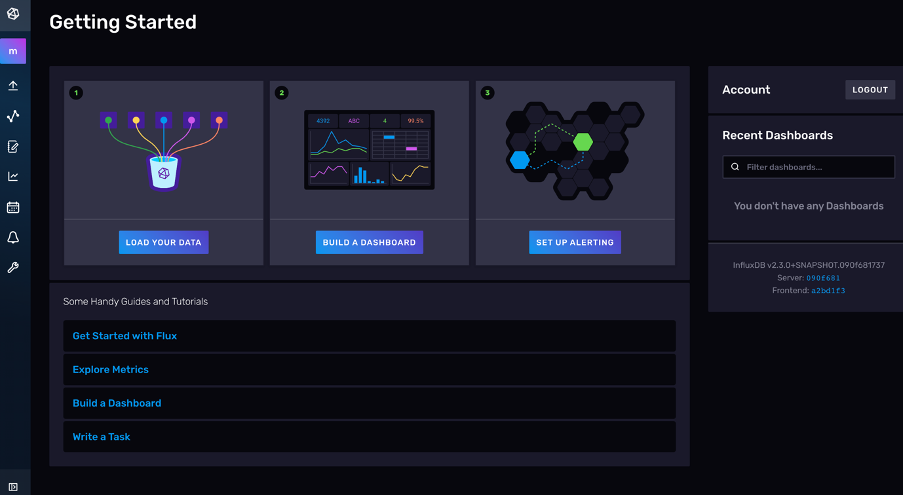
Go to localhost:8086 and put your username and password
Amount of Memory Used Data in Graph :

Amount of CPU Usage in Graph and Histogram :


Consumption of Messages by Telegraf (Confluent Platform) — Consumer:

For Part 4 : Intergration of InfluxDB2 with Grafana : Integration of InfluxDB2 with Grafana


Comments
Post a Comment