How to Start with Kustomize — it’s Features
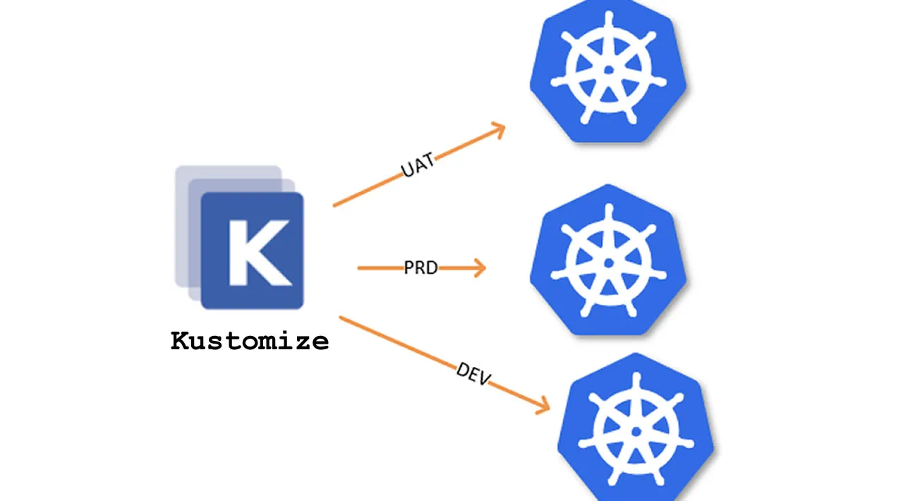
In this article, you will learn about why we use kustomize, what is kustomize and how it is linked with Kubernetes and different features of kustomize like Overlays, Base, how to change namespace, namePrefix, nameSuffix, images, ConfigMap and Secrets in your yaml files.
Why Kustomize?
Deploying applications to Kubernetes can sometimes feel unmanageable. Organizations having complex applications manage it by using several resources like deployments, services, configMap, secrets, replicas, service discovery and networking through a single API Interface.
Many organizations have multiple environments of their applications so that they develop and then test their applications before deploying into production environment. So that’s when Kustomize comes into picture. So using Kustomize you will be able to customize Kubernetes configuration files such deployments, services, ingresses, etc., to a specific environment. For example, replica-count or resource limit for pods , In dev and testing purpose you may require only 3 replica but in production you may require it in a larger amount like 10 or 12.
What is Kustomize?
Kustomize is an open-source configuration management tool and it lets you customize raw, template-free Yaml files for multiple purpose, leaving the original Yaml untouched and usable as it is. It’s native to Kubernetes . It is a standalone tool which customize Kubernetes objects through a kustomization file.
It uses declarative approach that can be described in Yaml and since it is template free, it express the power of Kubernetes API with no need to parameterize every single line compared to Helm. It is built into kubectl so, you can create and update resources using
“Kubectl apply -k “. Kustomize has the concepts of bases and overlays in it.
Base — It is a directory with a kustomization.yaml, which contains a set of Kubernetes resources such as deployment, services, configMap, secrets, ingress etc . A base could be either a local directory or a directory from a remote repo, as long as a kustomization.yaml is present inside.
Overlay — It is a directory with a kustomization.yaml that refers to other kustomization directories like bases. It contain environment-specific changes. It may be a name prefix, name suffix, configMap, secrets , replica count, a new image tag, or other changes. A base has no knowledge of an overlay and can be used in multiple overlays. An overlay may have multiple bases and it composes all resources from bases and may also have customization on top of them.
Install Kustomize
You can install kustomize by referring to the Documentation : https://kubectl.docs.kubernetes.io/installation/kustomize/
For my case I am using brew to install it
$brew install kustomize
Check the version -> $kustomize version

Check kustomize is running -> $kustomize
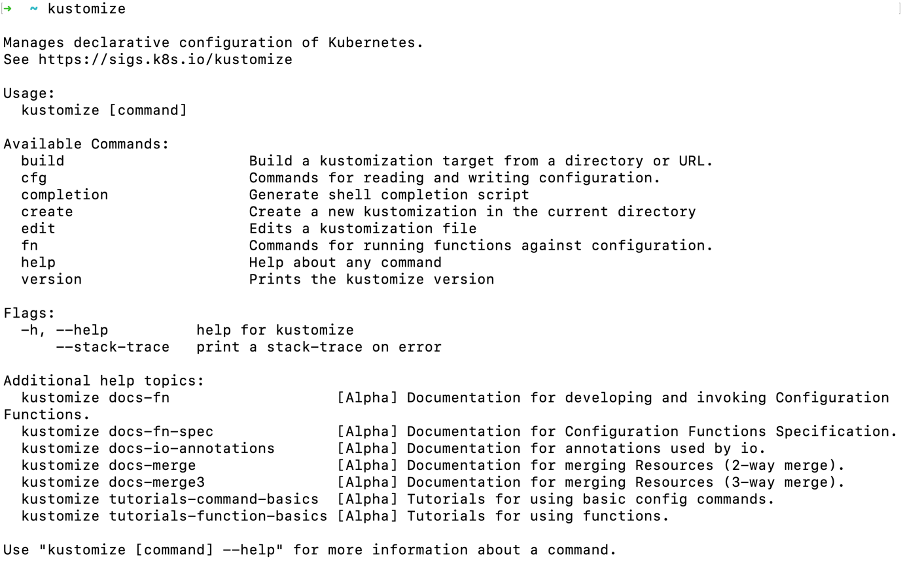
Kustomize Features
First Example → In this example, we will be using one deployment file having nginx image and we will be creating 2 environment prod and dev and will be show how to use these features like namespace, namePrefix, nameSuffix, commonLabels, commonAnnotations in kustomize so that for different environments we get different deployment resource.I am using minikube for the demo purpose, you can use any other or different clouds for cluster.
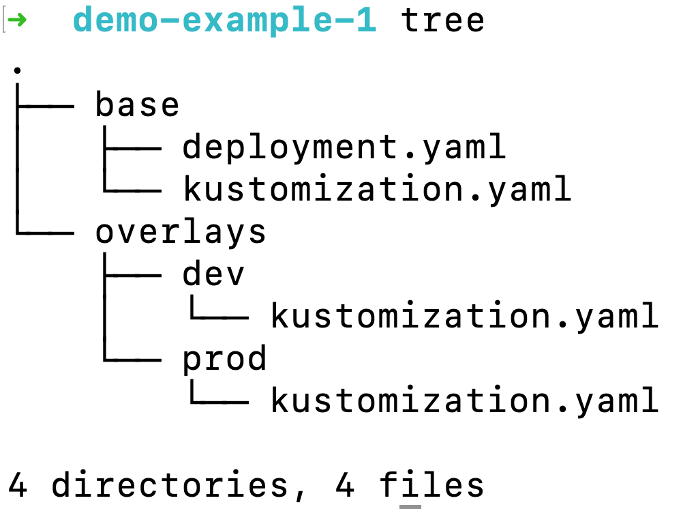
So , we are using this directory structure. We have 2 directories one for base where all Kubernetes resources will be there and one kustomization file and another directory as overlays where different environment directories are present. In each environment directory we will have kustomization.yaml file.
A kustomization file contains fields falling into four categories:
- resources — what existing resources are to be customized. Example fields: resources, crds.
- generators — what new resources should be created. Example fields: configMapGenerator (legacy), secretGenerator (legacy), generators (v2.1).
- transformers — what to do to the aforementioned resources. Example fields: namePrefix, nameSuffix, images, commonLabels, patchesJson6902, etc. and the more general transformers field.
- meta — fields which may influence all or some of the above. Example fields: vars, namespace, apiVersion, kind, etc.
Create a nginx deployment file in base directory by using this command. You can now see a basic deployment yaml file
$kubectl create deployment <deployment-name> — image=<image-name> — dry-run=client -o yaml > deployment.yaml

Then create kustomization.yaml file in base directory where “resources” field will contain all the Kubernetes objects you have defined and whose yaml files you want to kustomize, which in our case is “deployment.yaml”. The “commonLabels” field is used to add labels to all resources and selectors in your Kubernetes resources. We are defining “owner:Nandita” here, because we want this label to be added in both the environments (dev and prod) deployment.yaml file

Then we will create 2 directories in overlays directory, one for prod and another for dev environments. In each of the environments we will have kustomization.yaml file

In this kustomization.yaml in dev environment we have “bases” field which refer to the main directory (base directory in our case) where kustomization.yaml is present and resources field is mentioned in that.
Here, we are using different fields like commonLabels — env: Dev which will add Dev label to our deployment.yaml . Then we are adding namespace field as “nginx-dev” which will deploy our resources in different namespace in the cluster.
namePrefix and nameSuffix will add value of this field to the names of all resources. commonAnnotations field which will add annotations to all resources.
Same goes for prod as well.

After adding all these, now we can use kustomize build command to actually build the new YAML.
$kustomize build <path where kustomize file is present( env directory) >
Here, we can see all the changes in the new deployment yaml file
Dev ENV :

Prod ENV :

So let’s go to minikube, we can see that no deployment resource is created as for now.

Let’s create the 2 namespace one for dev(nginx-dev) and the prod (nginx-prod) which were mentioned in dev and prod kustomization.yaml file.

So after build we will create the resources by using
$kubectl create -k <path where kustomize file is present( env directory) >
You can see that all resources are created in dev and prod environments.

Second Example In this example, we will be following the same directory structure and show how we can achieve different replica set for dev and prod environments.

We will be having same content in the base directory files as mentioned in the first example.
In overlays dev and prod kustomization.yaml we are using “patches” field which can be used to apply different customizations to Resources. The names inside the patches must match Resource names that are already loaded. For example, create one patch for increasing the deployment replica number and another patch for setting the memory limit.
Here, we are adding file of replica-count.yaml in the patch field.

We have added 2 replicas for dev environment and 3 replicas for prod environment

After adding all these, now we can use kustomize build command to actually build the new YAML.
$kustomize build <path where kustomize file is present( env directory) >
Here, we can see all the changes in the new deployment yaml file


So after build we will create the resources by using
$kubectl create -k <path where kustomize file is present( env directory) >
You can see that all resources are created in dev and prod environments.

Third Example In this example, we will be following the same directory structure and show how we can achieve different images of nginx for dev and prod environments.

We will be having same content in the base directory files as mentioned in the first example.
In overlays dev and prod kustomization.yaml we are using images field to modify the name, tags and/or digest for one image without creating patches
In prod we are using image “1.22.0-alpine” nginx image and in dev we are using “stable-alpine” image.


After adding all these, now we can use kustomize build command to actually build the new YAML.
$kustomize build <path where kustomize file is present( env directory) >
Here, we can see all the changes in the new deployment yaml file

So after build we will create the resources by using
$kubectl create -k <path where kustomize file is present( env directory) >
You can see that all resources are created in dev and prod environments.

Here, when we describe the pod we can see the image of the container as “stable-alpine” in dev environment.

Fourth Example In this example, we will be following the same directory structure and show how we can create ConfigMaps and Secrets using configMapGenerator and secretGenerator field.

We will be having same content in the kustomization file in base directory files as mentioned in the first example.
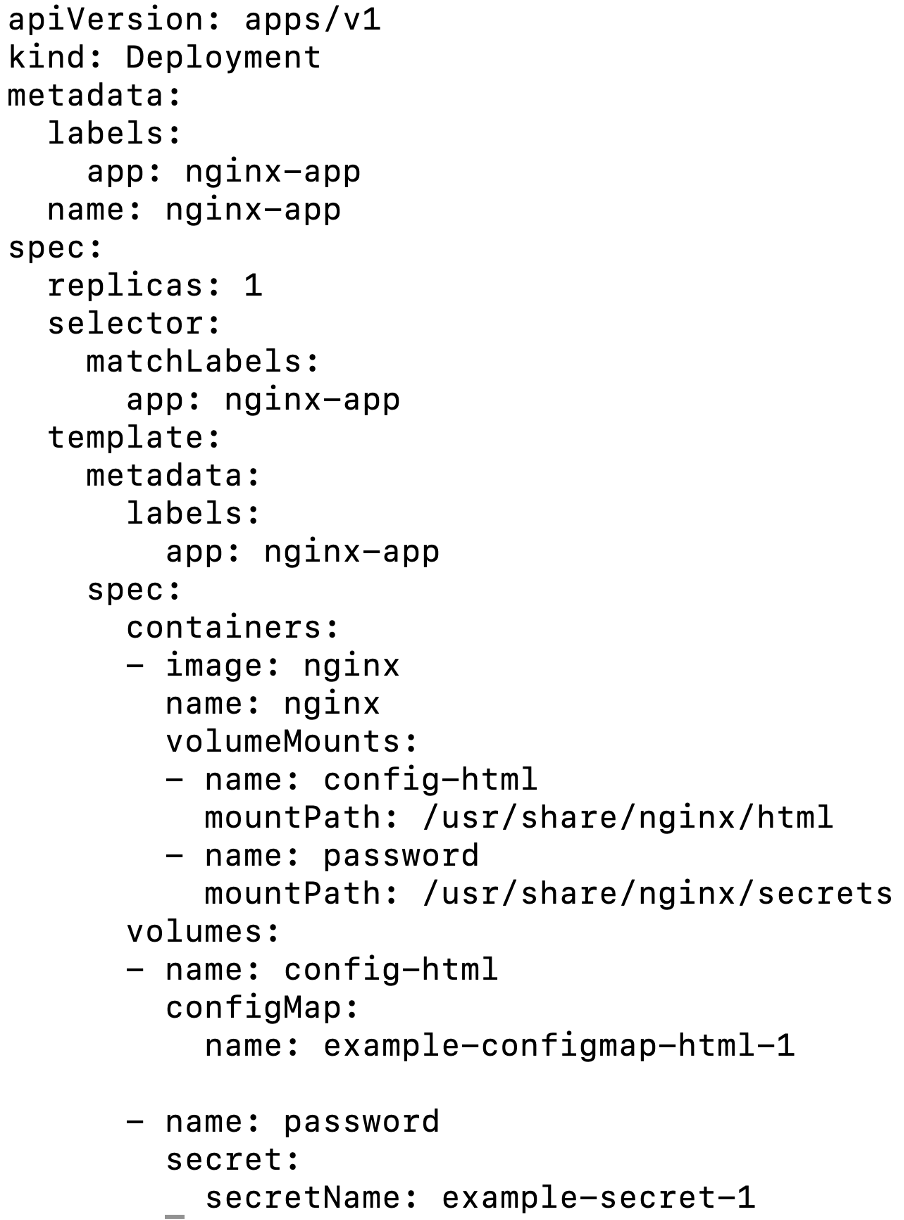
The deployment.yaml is a bit changed . Here we are using local volumes “configMap” and “secrets” to store some configuration details and secrets .
The volume field in deployment file is for mounting configMap and secret resources to the pods, their name field is same which is mentioned in dev/kustomization.yaml file. The second field “volumeMounts” is mounting the volumes of configMap and secrets to all containers present inside the pod.
mountPath field is for — (/usr/share/nginx/html) for configMap as we are changing the html page of the nginx and (/usr/share/nginx/secrets) for secrets , which is creating a secrets directory inside the given path.
In the overlays we are having one dev environment, you can replicate the same for prod as well.
In the dev/kustomization.yaml, we have added “configMapGenerator” field where we are generating a ConfigMap from a file, add an entry to the files list in configMapGenerator. The file is index.html . This html file will be replaced by the default nginx html file .
“secretGenerator” field which will be generating a Secret from a file “password.txt” . So this file will be created in the nginx container (path defined in deployment.yaml) .

Index.html file:

Password.txt:

After adding all these, now we can use kustomize build command to actually build the new YAML.
$kustomize build <path where kustomize file is present( env directory) >
Here, we can see all the changes in the new deployment yaml file

So after build we will create the resources by using
$kubectl create -k <path where kustomize file is present( env directory) >
You can see that all resources are created in dev and prod environments.

We can see the secrets and html page inside the nginx container


For all the code, reference my Github Page . Link is added below : getting-started-with-kustomize

Comments
Post a Comment