How to Integrate HashiCorp Vault with Jenkins to secure your Secrets
 |
HashiCorp Vault with JenkinsWhat is Vault?Vault is a tool that enables you to keep your secrets secured and encrypted. It can also do other things like encrypt data for your applications and generate temporary secrets and certificates for users and services. It is a cloud agnostic secret management system and safely store and manage sensitive data in hybrid cloud environment. It use to generate dynamic short-lived credentials or encrypt application data on fly.There are different types of secrets : Username and Passwords , Certificates , Encryption Keys , SSH Keys , API Keys. |

Secrets Management : Centrally store, access and distribute secrets. Vault would be a best way to store sensitive environment variables, database credentials, API keys and many more .
Encryption of Application Data : Vault can be used to encrypt/decrypt data that is stored elsewhere. It allow applications to encrypt their data while still storing it in the primary data store.
Identity Based Access : Authenticate and access different clouds , systems and endpoints using trusted entities.
Vault Server Modes
It has two modes :
Dev Mode for Development
Prod Mode for QA and Production
Dev Mode :
Initialized and unsealed — The server will be automatically initialized and unsealed. You don’t need to use vault operator unseal. It is ready for use immediately.
In-memory storage — All data is stored (encrypted) in-memory. Vault server doesn’t require any file permissions.
Bound to local address without TLS — The server is listening on 127.0.0.1:8200 (the default server address) without TLS.
Automatically Authenticated — The server stores your root access token so vault CLI access is ready to go. If you are accessing Vault via the API, you'll need to authenticate using the token printed out.
Single unseal key — The server is initialized with a single unseal key. The Vault is already unsealed, but if you want to experiment with seal/unseal, then only the single outputted key is required.
Types of Auth Methods


Before a client can interact with Vault, it must authenticate with an auth method to acquire a token. This token has policies attached so that the behaviour of the client can be governed. Auth methods perform authentication to verify the user or machine-supplied information. Some of the supported auth methods are targeted towards users while others are targeted toward machines or apps.
Why Vault instead of Jenkins Credentials ?
Problem with keeping our secret credentials in Jenkins is how pipeline handles credentials. Whenever a pipeline obtains a secret that is scoped, there are no limitations to it on how much and in what ways the pipeline can use them. This poses a potential security threat considering the pipeline may be interacting with uncontrolled external.
Another problem with Jenkins, its use of encryption methods. There is a static,single common master key and static single common hudson.util.Secret object. Both of these combine to encrypt our credentials. If access to our Jenkins host is compromised, we risk leaking these two keys and thus are credentials will be exposed.
The advantage of using Vault is
· It adds another layer of authentication over Jenkins.
· We can add multiple policies to access the same secret.
· Vault have rotation policy to any of the secrets you create.
· Centrally place to store, access and distribute secrets for organization.
 |
 |
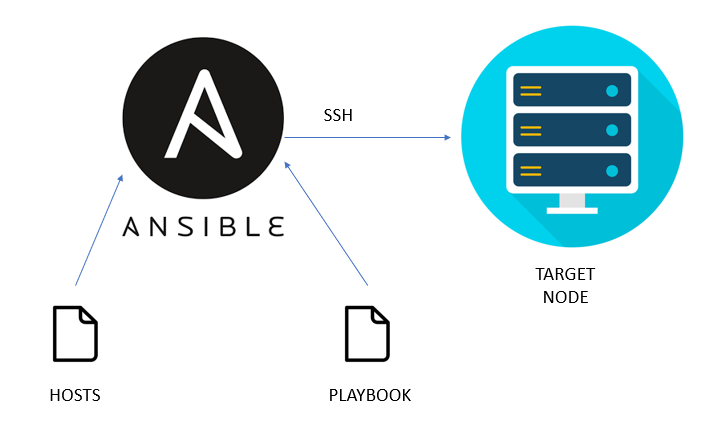
Workflow Diagram of communication between Jenkins and VaultInstallation of Vault (Ubuntu):sudo apt update && sudo apt install gpg wget -O- https://apt.releases.hashicorp.com/gpg | gpg — dearmor | sudo tee /usr/share/keyrings/hashicorp-archive-keyring.gpg >/dev/null gpg — no-default-keyring — keyring /usr/share/keyrings/hashicorp-archive-keyring.gpg –fingerprint echo “deb [signed-by=/usr/share/keyrings/hashicorp-archive-keyring.gpg] https://apt.releases.hashicorp.com $(lsb_release -cs) main” | sudo tee /etc/apt/sources.list.d/hashicorp.list sudo apt update && sudo apt install vault Verifying the InstallationAfter installing Vault, verify the installation worked by opening a new terminal session and execute command  Starting a Production Vault ServerCreate the Vault configuration in the file “vault_  Within the configuration file, there are two primary configurations: · storage: This is the physical backend that Vault uses for storage. · listener: One or more listeners determine how Vault listens for API requests. The example above listens on localhost port 8200 without TLS. · api_addr: Specifies the address to advertise to route client requests. · cluster_addr: Indicates the address and port to be used for communication between the Vault nodes in a cluster. Starting the ServerThe ./vault/data directory that file storage backend uses must exist. $ mkdir -p ./vault/data Set the -config flag to point to the proper path where you saved the configuration above.  Launch a new terminal session, and set VAULT_ADDR environment variable and check the status of the vault. $ export VAULT_ADDR=’http://127.0.0.1:8200' $ vault status  To initialize Vault use vault operator init. This is an unauthenticated request, but it only works on brand new Vaults without existing data:  Every initialized Vault server starts in the sealed state. From the configuration, Vault can access the physical storage, but it can’t read any of it because it doesn’t know how to decrypt it. The process of teaching Vault how to decrypt the data is known as unsealing the Vault. $ export VAULT_TOKEN=<root token> $ vault operator unseal  When the value for Finally, authenticate as the initial root token (it was included in the output with the unseal keys). $ vault login <root token> Go to <IP Address>:8200 — → Shows the UI of the HashiCorp Vault PageAppRole Authentication MethodAn “AppRole” represents a set of Vault policies and login constraints that must be met to receive a token with those policies. An AppRole can be created for a particular machine, or even a particular user on that machine, or a service spread across machines. Enable the AppRole auth method: $ vault auth enable approle Create a named role: $ vault write auth/approle/role/jenkins-role token_num_uses=0 secret_id_num_uses=0 policies=”jenkins” 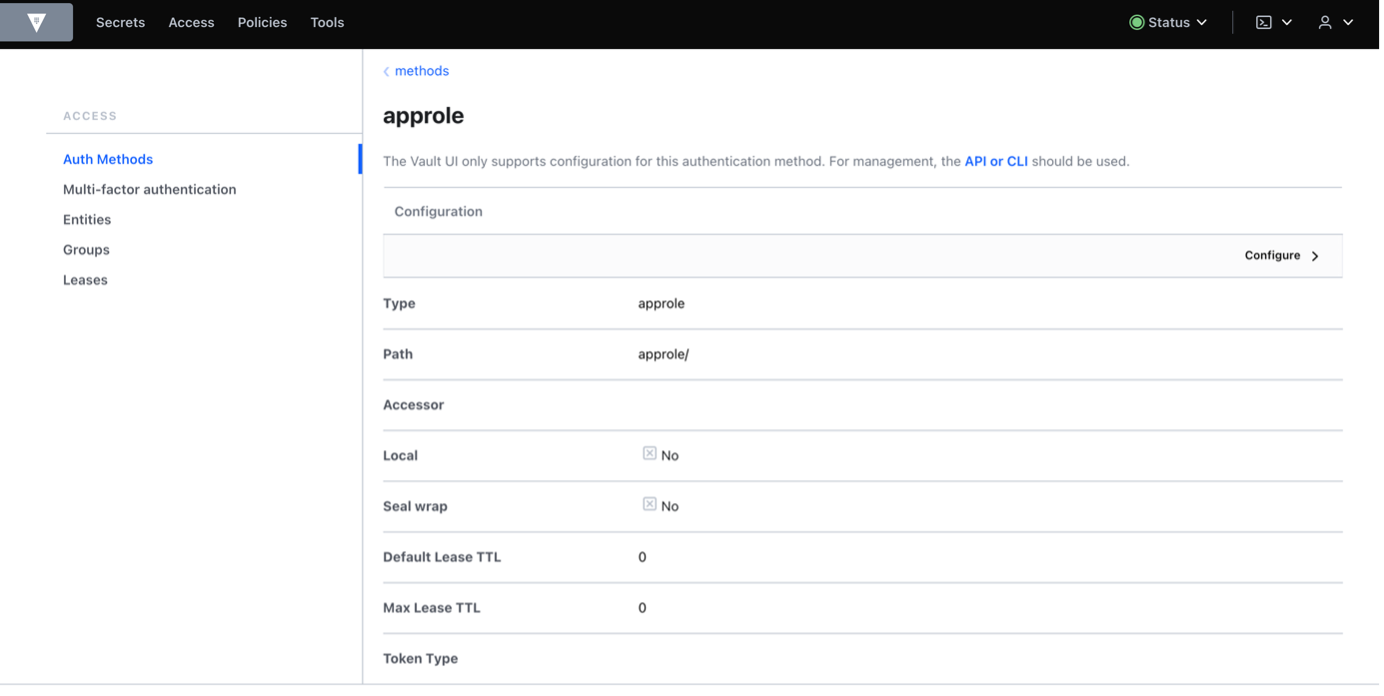 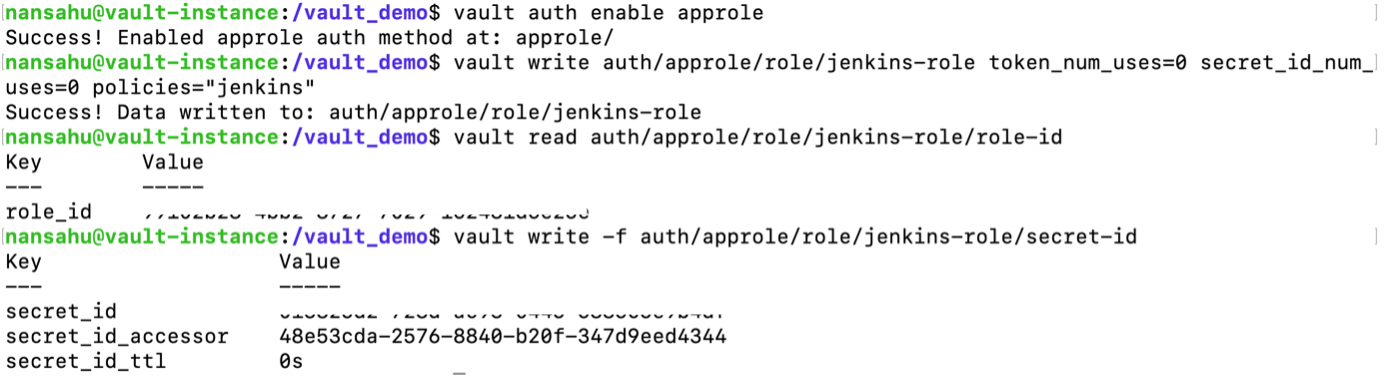 token_num_uses: If the token issued by your approle needs the ability to create child tokens, you will need to set token_num_uses to 0. secret_id_num_uses=0: Creating unlimited secrets policies: Creating policy with the name of “Jenkins” Fetch the RoleID of the AppRole:$ vault read auth/approle/role/jenkins-role/role-id Get a SecretID issued against the AppRole:$ vault write -f auth/approle/role/jenkins-role/secret-id Install Vault Plugin & Integrate vault with Jenkins: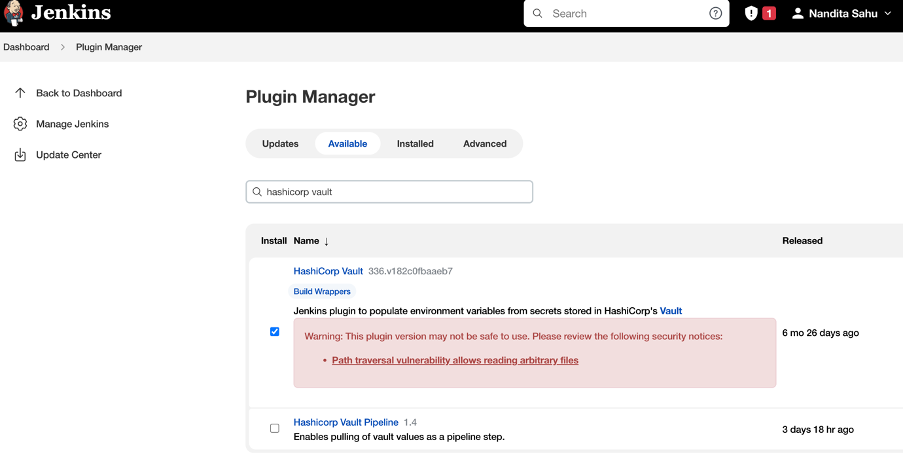 After installing the plugin, Navigate to Manage Credentials and add credentials and select credential type as Vault AppRole Credentials and fill out the role ID, Secret ID, path and ID as generic name to identify and click on Add. The Role ID and Secret ID are ones which we got in the upper slide. 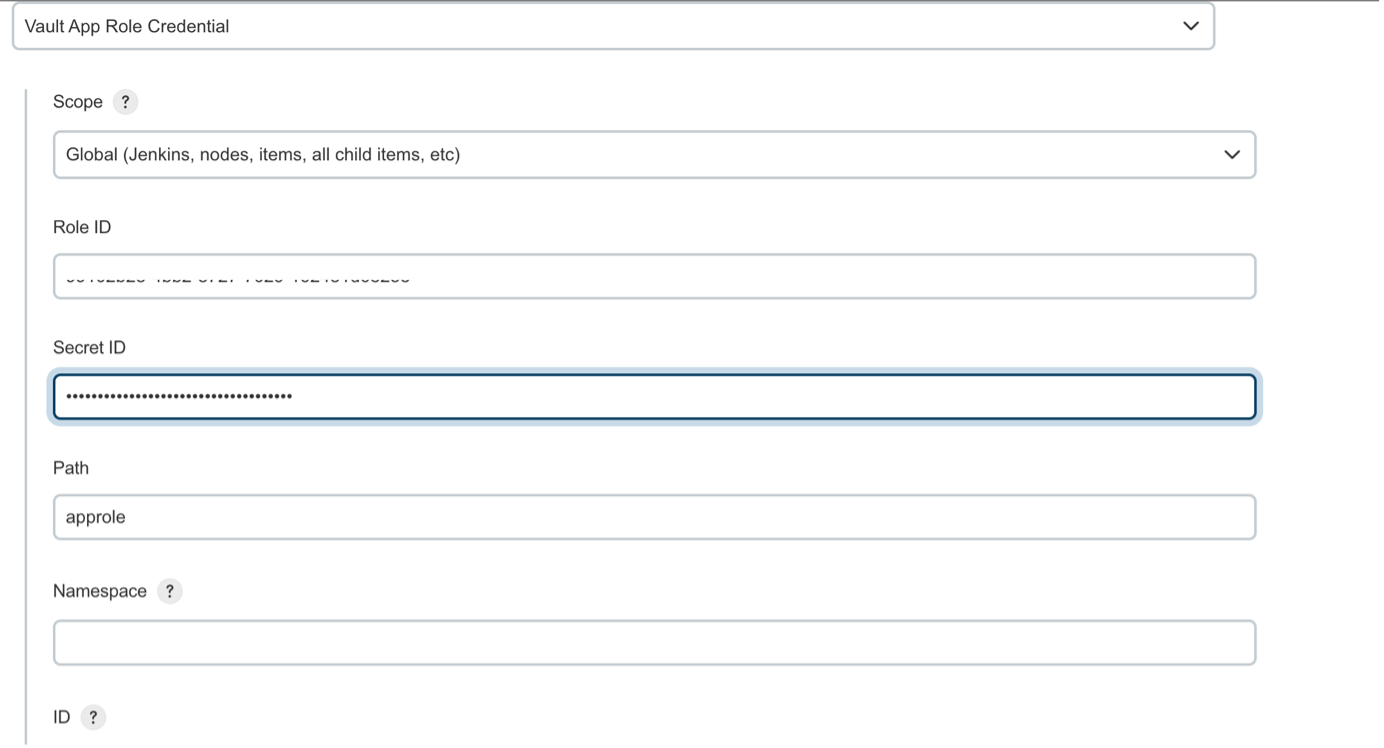 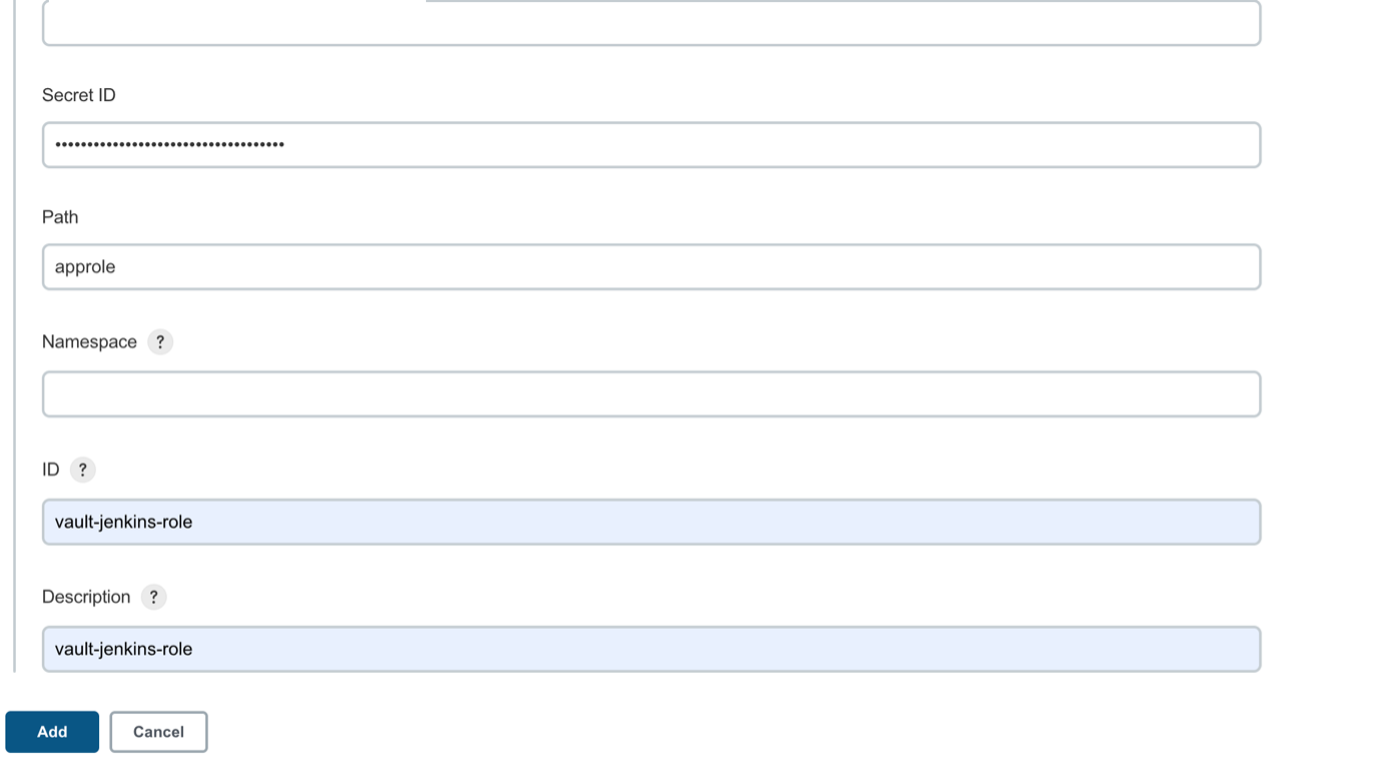 Vault plugin configure in Jenkins 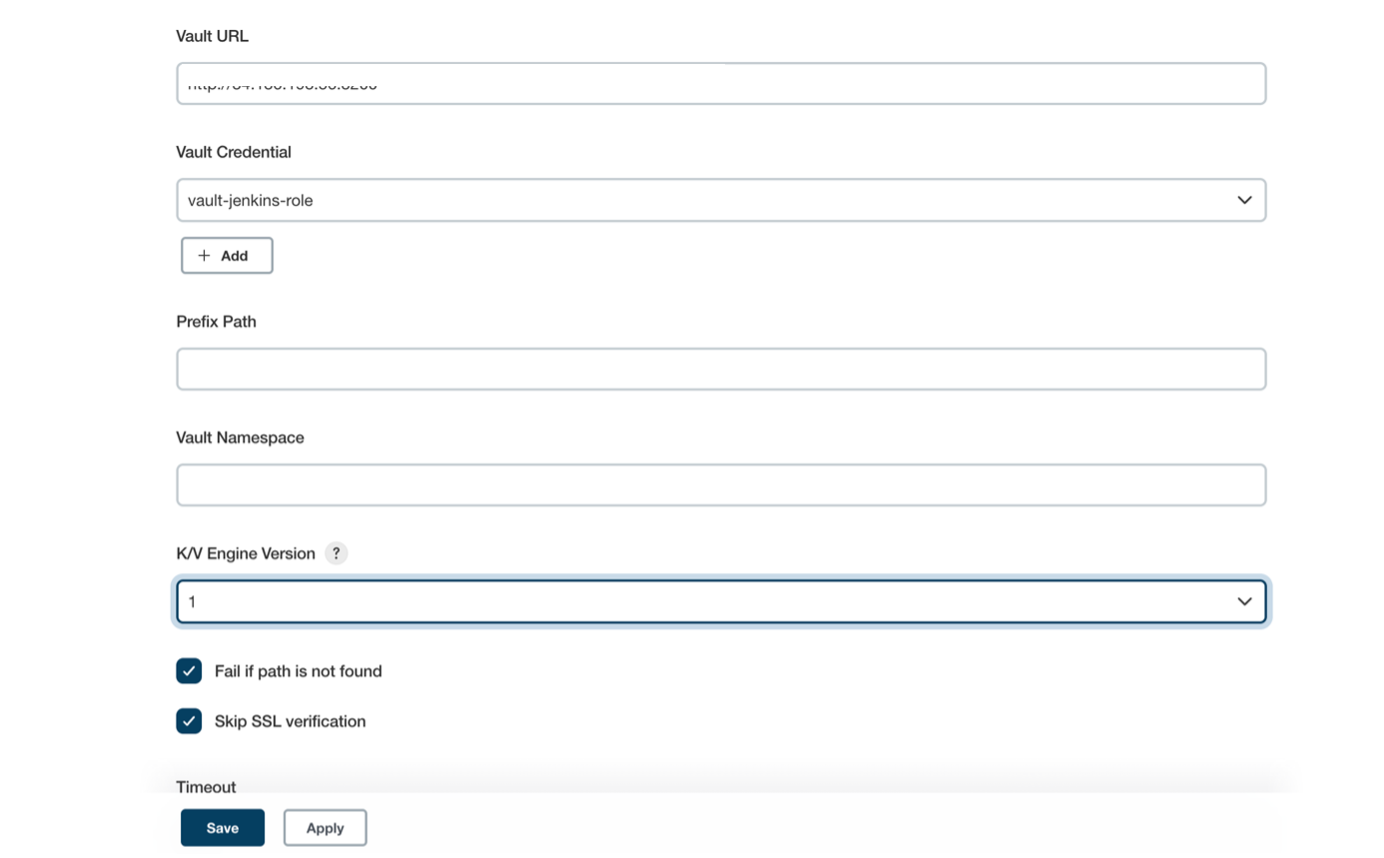 Fill “Vault URL” (URL where Vault UI is accessible), “Vault Credential” (where we add the credentials mentioned in Jenkins for approle as vault-jenkins-role) .Click on advance settings to disable the ssl certification. (As we have not used SSL Certificates in demo). Create Secrets in VaultEnable Secrets where path = “secrets” and it will using key value pair
Write a Secret in Vault at path “secrets/cred/my-secret-text” with key as secret and value as jenkins123 $ 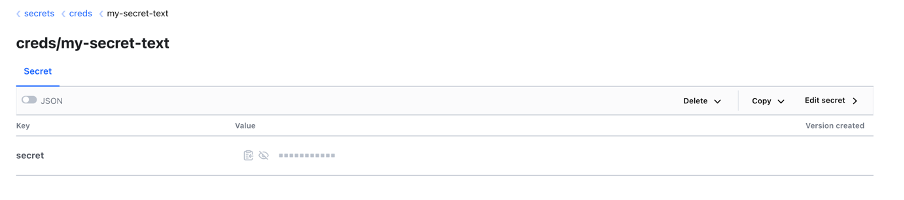 We now create a policy to give permission to approle to retrieve secrets $ vi jenkins-policy.hcl 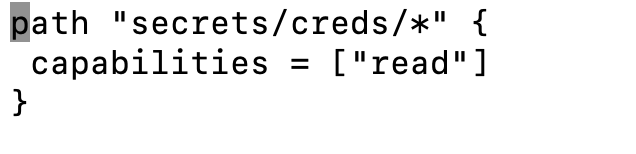 This policy is giving read secrets permission to approle , those secrets which are stored in the path “secrets/creds/*” (In vault) $
 Navigate to Manage Credentials and add credentials and select credential type as Vault Secret Text Credentials and fill “Path of the Secrets stored in Vault “ and ID .  Create a Declarative Jenkins Pipeline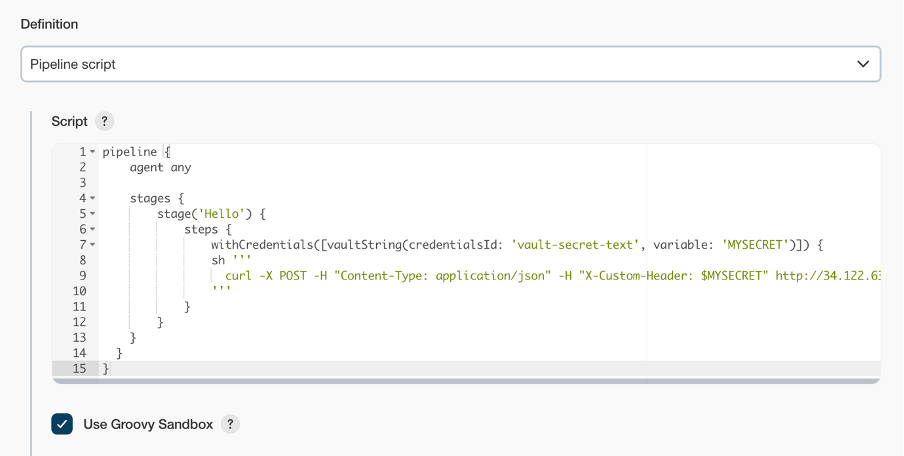 Here , we are using withCredentials function . We are using ‘credentialsId’ : Id of the secrets(my-secret-text) which we have declared in Jenkins Configure Credentials and ‘variable’ as ‘MYSECRET’ : which we will be using in jenkins pipeline referring to the ID of the secrets created in Jenkins. 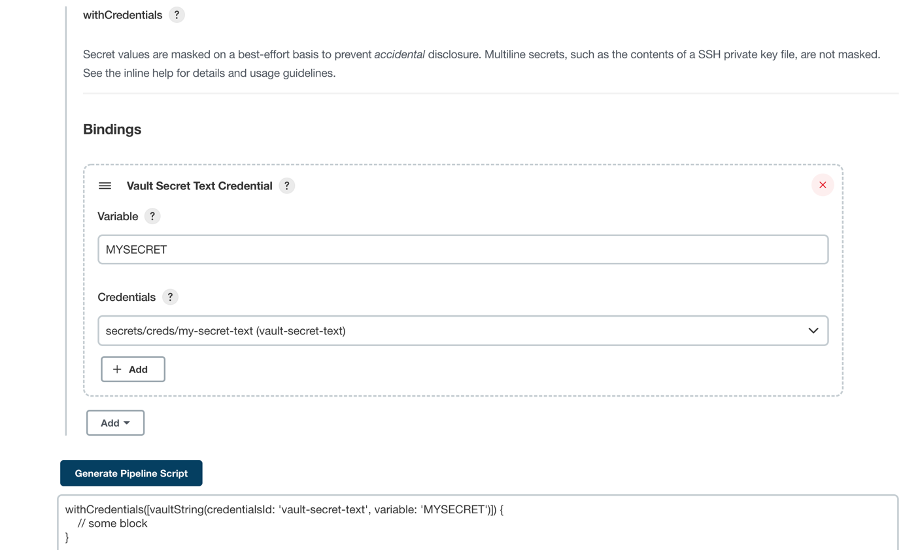 Output of the Jenkins Declarative Pipeline : 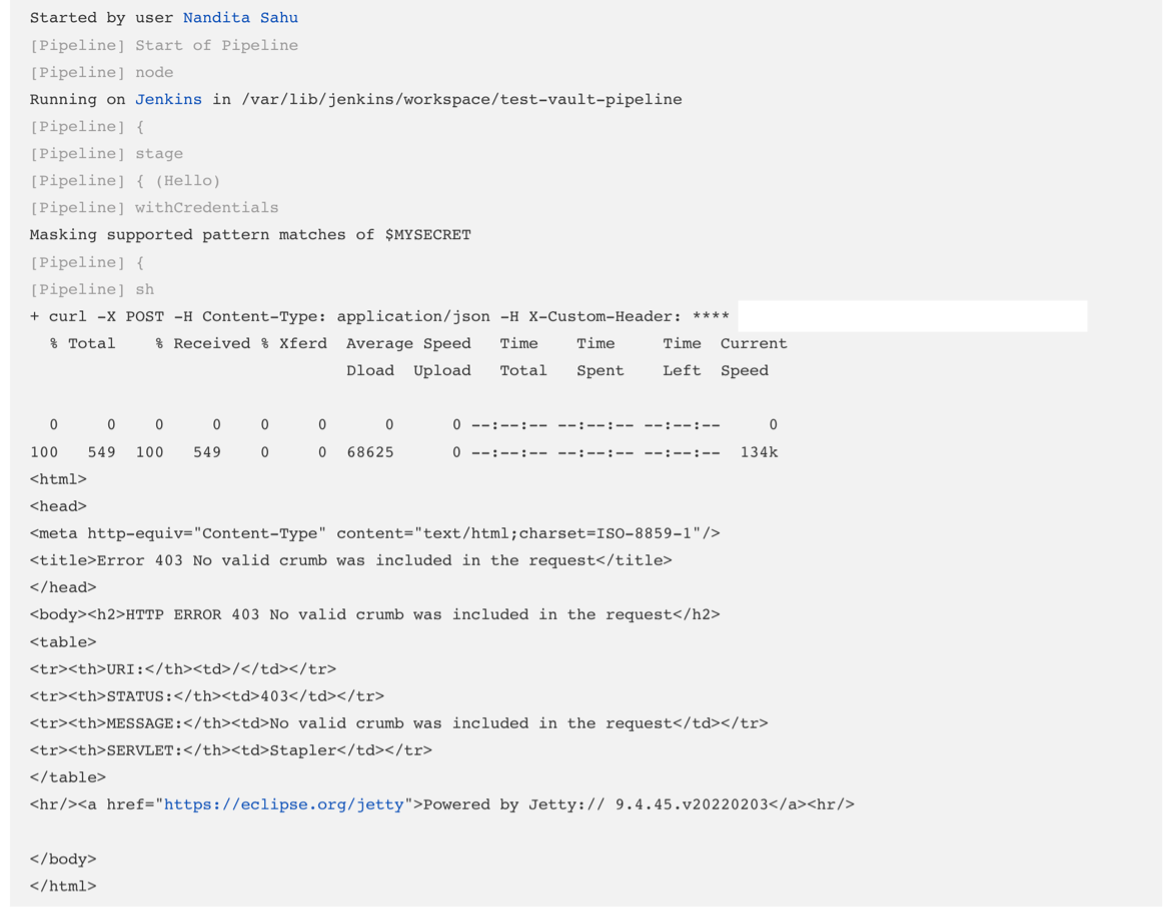 For more references , go through the below videos and links : Vault Fundamentals |


Comments
Post a Comment